Page content
If you have been booked into one of the University rooms which has a touch screen controller. Use the following steps to activate the technology and link the rooms so that dual projection can be achieved.
1. Wake up the touch screen controller
When first entering the room the Touch panel (TP) may be blank. Either wave your hand in front of the TP or tap to wake up.
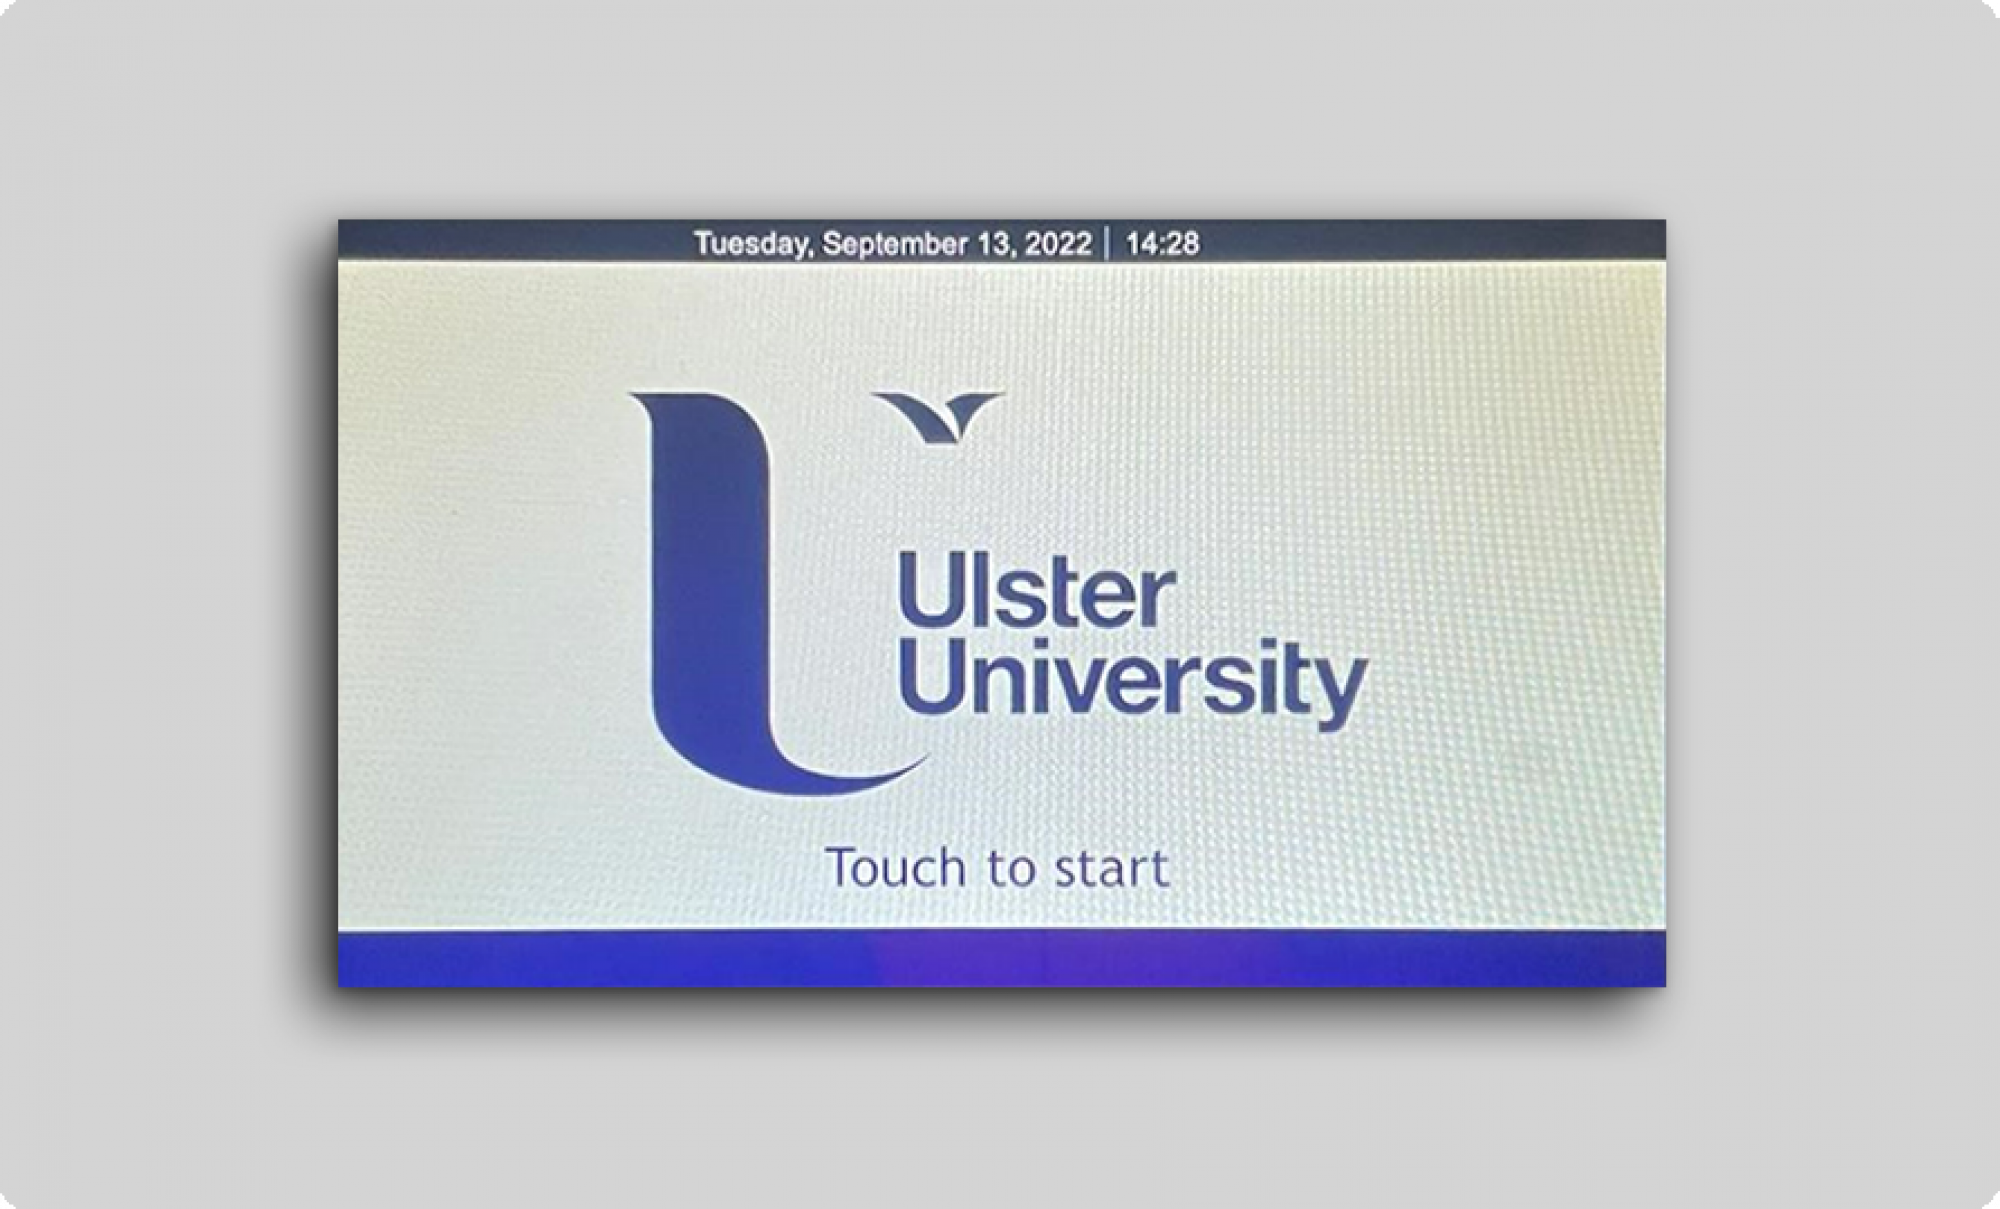
2. Startup Screen
Once the screen has woken, you will see the startup screen, touch the screen to start.
3. Input Selection
Once the system has started up, you must make an input selection (PC, HDMI, Wireless etc.) this will then start up the projector and display your chosen input.

Additional features
To link rooms/dual projection
If the room is to be used in dual projection mode
- Make sure the secondary desk is off. (The secondary desk will be the one which is positioned in the room with a letter after it ie. BD-01-014 A)
- Select the Link button in the top left-hand side of the TP of the primary desk (The primary desk will be the desk which is positioned in the room without a letter after it i.e. BD-01-014)
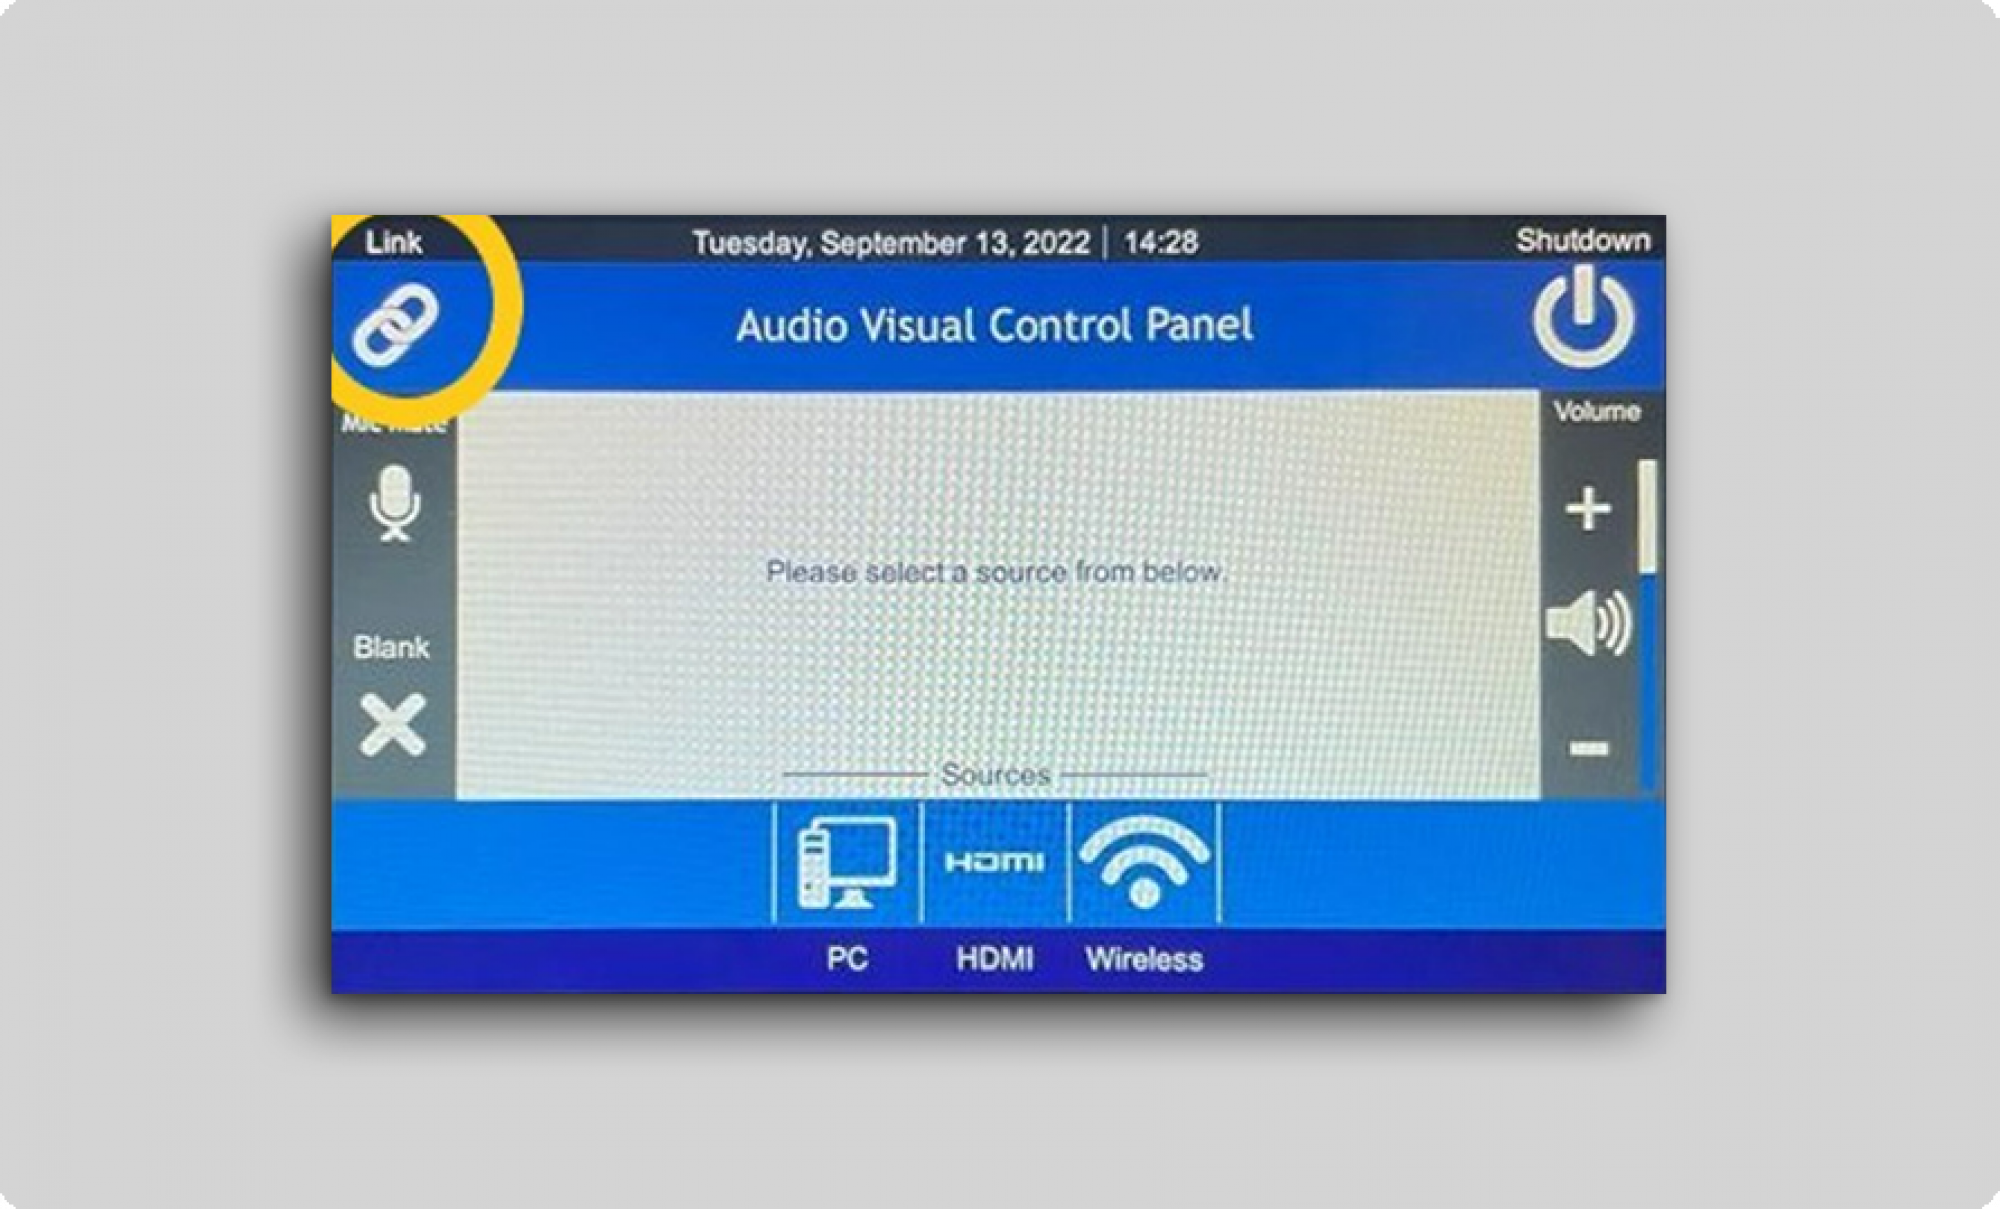
When asked if you would like to link rooms, select yes.
The second projector should now start up and display your chosen input.
Additional buttons
- Mic mute - Mutes all microphones attached to that desk with the exception of the Recording microphone.
- Blank - Blanks the input content to the projector